Say we need to make these fancy buttons in pure CSS:
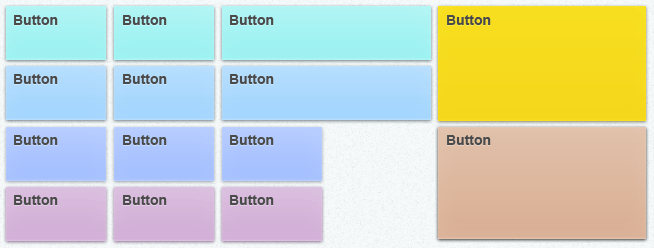
Now let's say we need 10 of those buttons, all with different colors. We could write out each rule by hand and end up with all this:
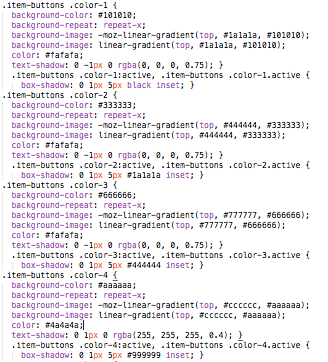
Aren't we saying the same thing over and over here? Isn't this the sort of headache that SASS was supposed to alleviate? SASS, or Syntactically Awesome Style Sheets, was meant to bring logic and brevity to CSS, a language sorely lacking in both. So how can we make this CSS more syntactically awesome? With nothing more than a for loop, some lists, and a little method called nth.
Note, these examples will use .sass syntax rather than .scss. This means there are no semicolons or brackets used, only different tab levels are needed.
Lists
First let's talk lists. In SASS-land a list can be a space or comma separated. As soon as SASS sees a comma, it will interpret the list as comma delineated. This allows us to write lists with complex values such as:
$myCSS: 0 1px 2px #444, #aaabbb, 25px With a list, we can iterate over it using the methods @each, @for, and @while.
@each
The following example, adapted from the SASS reference, shows us how we can use @each:
$animals: puma, sea-slug, egret, salamander // Our List of animals @each $animal in $animals .#{$animal}-icon { background-image: url('/images/#{$animal}.png') // We use the #{ $variable } to output it as text This compiles to the following CSS:
.puma-icon { background-image: url('/images/puma.png'); } .sea-slug-icon { background-image: url('/images/sea-slug.png'); } .egret-icon { background-image: url('/images/egret.png'); } .salamander-icon { background-image: url('/images/salamander.png'); } @each is pretty nice when we want to iterate through a list and use the list contents as values in our compiled CSS.
@for
Now let's try out @for, which works like for loops in most every language.
@for $i from 1 through 3 .item-#{$i} width: 2em * $i; We setup $i to hold the number of the iteration we're on, an integer to start on, and an integer to end on. Next we pass $i through #{} to output it as a string. Finally note that to calculate the width, we call $i without #{}, which leaves it as an integer and thus useable in a mathmatical calculation. SASS is smart enough to know that the output should use em's. Here's our compiled CSS:
.item-1 { width: 2em; } .item-2 { width: 4em; } .item-3 { width: 6em; } nth
Now that we've got a handle on @for, we just need to take a gander at nth.
The nth function takes two arguments: nth( $list_name, an_integer_starting_with_1 )
For example:
$my_list: apples, bananas, pears .fruit-#( nth($my_list, 2) ) background-color: yellow outputs:
.fruit-bananas{ background-color: yellow; } Putting it all together
Now let's get back to our button example. We only need simple hex values for colors, so our lists will look like this:
$color-1: #f5f5f5 #f3f3f3 #808080 $color-2: #84ddea #6ed5e5 #4c8f99 $color-3: #aef4f4 #9af1f1 #5d8c8c $color-4: #b4ddfd #a1d4fd #638096 $color-5: #b5cbff #a2beff #637499 $color-6: #d9bddd #d0acd5 #86708a $color-7: #96d3b9 #7dc8a7 #52806c $color-8: #505050 #434343 #1a1a1a $color-9: #f7de1f #f5d61a #8f7e10 $color-10: #e1bfa9 #d9af93 #735d4f So now each color has its own list, but we can't iterate over them as a group yet. For that, we need to make a list of lists.
$colorList: $color-1 $color-2 $color-3 $color-4 $color-5 $color-6 $color-7 $color-8 $color-9 $color-10 Now we can iterate over the group.
@for $i from 1 through length($colorList) .color-#{$i} background: linear-gradient(top, nth(nth($colorList, $i),1) 0%, nth(nth($colorList, $i),2) 100%) box-shadow: 0 1px 5px nth(nth($colorList, $i),3) inset color: #fafafa text-shadow: 0 -1px 0 rgba(0, 0, 0, 0.75) Woah now, double nths? As powerful as SASS is, it's not a full programming language and sometimes you just need to jam things together to get what you want. So what's going on here?
We start with an @for loop and utilize the length() function to get the number of items in our $colorList, in this case 10. Then we ouput a classname utilizing $i as a string. In order to access the values in a list within a list, we start with an inner nth
//Let's say $i == 2 nth($colorList, $i) // $color-2 Then we can call nth on $color-2 with an index parameter of 1 to get the first color in its list:
nth($color-2, 1) // #84ddea The final CSS for $color-2 would look like:
.color-2 { background: linear-gradient(top, #84ddea 0%, #6ed5e5 100%); box-shadow: -1px -1px 1px #4c8f99 inset; color: #fafafa; text-shadow: 0 -1px 0 rgba(0, 0, 0, 0.75); } Wrapup
Now that we have this code in place, adding a new color style is as easy as adding another $color-n list. We don't need to worry about adjusting anything else. Also the code in this example is pretty direct. We should pass our color variables to a mixin that takes care of all the vendor prefixes and compatibility problems while keeping our code clean.
In a future post I'll show how we use the lightness() method to make decisions about text color within the button. In the meantime I encourage you to read through the SASS documentation and functions reference.
References:
Thanks
Major thanks to Ian who introduced these techniques to me through his well written code.

